Posts

Showing posts from August, 2014

Shiny bits shiny pt2 - forks

Image
 One really big giveaway that your bike is getting a bit old is when the forks start to get a bit flaky. You look at them thinking how naff they look but at the same time knowing how long and much of a pain in the ass it is going to be to restore them. After all its not going to cause a break down is it? Well I didn't buy the tarts handbag NSR for it to have furry forks so its time to get at them fork stanchions. This wasn't going to work well without being able to get the front end off of the ground and without any paddock stands to hand this wasn't going to be straight forward. I stuck some axle stands under the pegs, getting the back end up and leveling the bike off then  stuck a well padded hydraulic jack under the engine and lifted the front up. With her front wheel off the ground I removed the mudguard, brake calipers then the wheel to give me maximum access to the forks. Whilst I was there I checked the headrace bearing play and was pleased to find them notch fr

A catchy title

Image
I have already mentioned early on in the break down process that the boot/ tool box lid catch was an issue. Well in the seance that it wasn't there that is. I made a quick temporary fix using tie wraps that worked perfectly well but for obvious reasons I wanted something a little better. Still with no original part available I opted to fabricate something out of some old bits of aluminium that I found lying about. It didn't need to be a work of art as it's all a bit out of sight but it needed to be functional. One of the scraps I had was an L bracket with two holes along one edge and a slotted hole in one corner of the other edge. The other piece was a straight piece with a long angle cut out of one corner, it was also base coated green unlike its plain ally, L shaped buddy. Both pieces had rounded corners and the L bracket had two sprung anchor nuts with it that would prove to be useful. The L bracket just so happened to have its two holes drilled exactly where the

Carb cleaning

Image
When I looked down into the airbox and saw that thin coating of grime along the intake trumpets I knew cleaning the carbs was a good plan. I had already whilled the airbox off and cleaned all of that gunge off with degreaser leaving me a better view of the carbs themselves. With the trottle held open you could see browny gold wax deposits on the needles that could only mean bad things through the rest of the carb. Mind you the bike ran fairly well so on the other hand it couldn't be that bad could it? NSR World  have a great walk through on breaking down the carb on the MC18-21 bikes. Althought eh cars on the MC28 are different they are pretty similar so this was a good reference to help if I got stuck later on when trying to put this all together. So with the confidence inspired by a few reference photographs and the guidance from the website above, I cracked on with removing all the throttle cables, choke cable and various hoses. Two cross head screws held the clamps do

Black bits black and some of their friends

Image
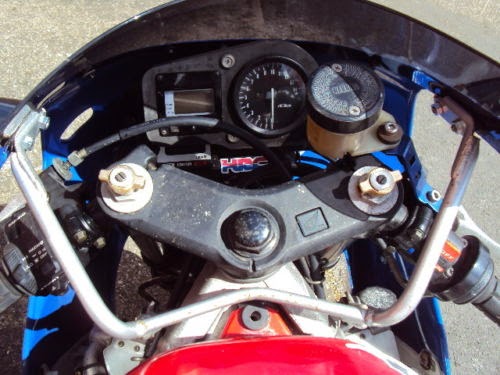
The headstock was looking tatty and the mirror stems on my VFR were beginning to flake so seeing as the tape was still on the line from repainting the subframes I decided to do the same for black bits. I had already gone round the bike with a tin of Hammarite recoating some of the fairing brackets and the bar ends so there wasn't allot of bits that needed doing.  I removed the preload adjusters, headstock nut and head stock then looked around for more bits to paint. The bottom bracket of the headstock could have done with a paint but at the time I didn't have anything suitable to use as a stand so I could drop the front end off. This could wait for another day perhaps.   The brake reservoir cap is also metal so that came off and then my attention turned to the brake resevoir bracket. For some reason the previous owner had put a blue anodised after market bracket o this bike. These are far from expensive to replace but i knew the original was black so for the time

Silver bits silver

Image
You know when you can't see something but you know it's there and you know its not quite right? Well that's how I felt about my NSR's subframes. They were far from ghastly but they were spotted with corrosion from where wiring looms had rubbed and heavy handed toolmanship had chipped away at the old paint. So having raided Halfords for some paints I took all of the subframes off of the bike. I have seen and liked the Tyga clock stay and front fairing subframe but I still decided to spray the originals. I have seen a forum post where someone managed to snap their Tyga clock stay during disassemble (sorry couldn't find a link), putting me off that a little and for the time being it was worth tidying up the original parts whilst I already had the paints out. The first job was to remove all of the corrosion and old paint. This I achieved with a couple of wire brush bits on the end of my drill and smoothed off with some wet and dry. With all of the parts off and

The wonderful world of wiring

Image
During the run up I had noticed that I had some rather funky goings on with my indicators. My fronts were permanently on only going out when that sides indicator was selected and the rears were flashing on the wrong sides. that was if they worked at all as they were pretty intermittent. As I was stripping down the bike I took a look at the wiring under the tail unit. All the wiring was connected up correctly yet I was still getting a back to front indication.  I disassembled all the connections A took the time to polish the little brass connectors to reduce resistance in the system and put it all back together again. I tried swapping the wiring round, leaving the common earth as it is and swapping the live wires. Success!  Everything worked as it should but why only when the wiring was plugged in incorrectly?  This was baffling for 10 seconds longer than it aught to be when I realized the indicators had just been installed on the wrong sides by the importer. So I swapped them

Shiny bits shiny (pt 1 of 100)

Image
One of the nice bits of restoration is that not all of the jobs that need doing require you to spend hours scouring the internet for advice and parts. One of these jobs is surface finish restoration. The downside of surface finish restoration is it is time consuming, not very interesting and results in some serious "wankers cramp". It is however important and when finished quite rewarding. I elected to have a go at the left side rearset first, so went about removing, then disassembling it.  This rearset was not only corroded but had clearly been set up badly in the past, allowing the gear selector tie bar to rub against the hangar resulting in a deep gouge. So with needle files I smoothed this out then went through the grades of wet and dry from 100 to 8000 to make it look less ugly. There was no real need to go through all of the grades like that as I was going to have to do the whole hangar later but I wanted to see if this was worth keeping. New rear set

Time to strip down the bike this time

Image
Brew in hand I opened the dirty work garage, tripped the alarm off and plonked the cup on the side. Walking over to the other garage (yer I have two, I don't like to brag..) I rolled the NSR out and over to the the second garage where all of my tools were kept. Bumping her up onto the wooden platform that served as floor insulation in this garage, I sat her on the side stand, cursing my lack of forethought in not buying a suitable paddock stand. I grabbed up my allen key bits and went about removing fasteners. This ended abruptly when I was confronted with m10 bolts on the side fairings. Note new fasteners needed! The right side dzus fasteners were okay however, so with this small pannel off it allowed me to take off the lower and left side panels off with a socket wrench. The front filler had a large crack threw it that the importer had plastic welded back together and seeing as the lower clips had cracked on the left and right lower fairings I left this all as one piece

Time to strip down the bike

Image
A week off work gave me some time to get into a quick strip down inspection of the NSR to really get a good picture of what I have gotten myself into. But hang on, I have a [purple] smokin' hot 250cc 2T pocket rocket of joy. Lets fire this thing up!!! I put the ignition card in with a click that brought life to the LCD display of the PGM IV unit and simultaneously disengaged the steering lock: something that had stumped the importer initially with no battery connected and a bike that only wanted to be pushed in circles. I wheeled the bike out of the garage, tuned the fuel to reserve and put the choke on. With the ignition briefly off I gave the kick start a couple of slow pokes to prime things then clicking the card back in and gave her a sharp kick making her immediately rasp into life. The tick over rose then slumped into an uneasy stumble quickly, so I disengaged the choke and felt the bike settle down. Hovering my hand about the throttle the bike continued to burble a